Preparing meals is an essential step in planning a backpacking trip. You want to make sure you pack out foods that can withstand the conditions of outdoor travel, require minimal preparation, provide you with adequate nutrition, and taste good. You want to remember crucial items like your morning coffee. Here are a few tips to keep in mind when planning your backpacking food.
1. Purchase Common Dry Goods from Grocery Stores
There are so many dry packaged foods that can be purchased from grocery stores or markets that are ideal for the trail. Get what you can at local markets to save money — for instance, granola, instant milk powder, snack bars, tortilla/pita, precooked pasta/noodles, couscous, instant rice, nut butter packets, dry fruits, nuts, and portioned spice packets. Harder to find items such as dehydrated vegetables, pre-cooked dried beans, non-dairy milk powders, powdered whole eggs, hummus powder mix, instant quinoa, and high-calorie vegetarian backpacking meals can be found online, at specialty health food stores, and international markets.
2. Read the Cooking Instructions in Advance
When purchasing boxed mixes from markets, check the package for any additional ingredients required to prepare the dish. Ideally, you want something that only calls for adding water. Substitutions can be made for many common ingredients, such as olive oil for butter (look for single-serve olive oil packets) and dried vegetables for fresh.
3. Read the Nutrition Label
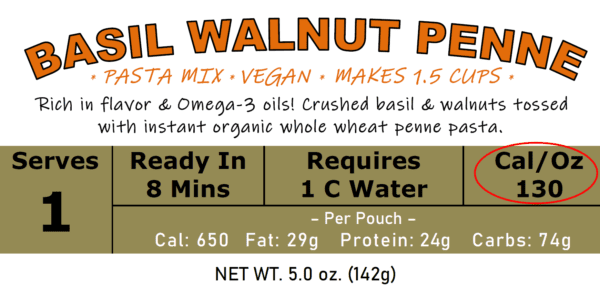
Look at the nutritional panel for each product in advance to determine if it will contain enough calories. Calorie needs depend on the terrain and individual needs. A good rule is to look for meals containing at least 100 calories per ounce.
4. Look for Fast Cooking/Instant Foods
Stay away from packaged foods that take longer than 10 minutes to cook, especially for longer trips when you’ll need to ration fuel. Fast cooking meals can be cooked without simmering in a few minutes using the boil and soak method.
Packing Store Bought Foods for Backpacking

1. Repackage Store bought Ingredients or Meals into Zipper Bags
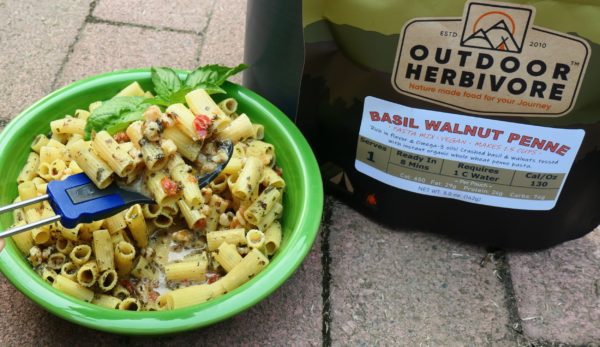
Repackage meals in zipper bags to minimize space and weight. Use the pint-sized freezer bags if you want something a little more durable than the thinner plastic sandwich bags. If you are looking for an extra durable zipper pouch, see Outdoor Herbivore’s heat-safe backpacking meal pouches. These pouches were specifically created for backpackers needing a durable bag for storing and reconstituting food. Don’t forget to include the cook instructions with the meal.
- Only vacuum seal meals for long-term food storage (1+ years). Vacuum sealing food is unnecessary (overkill) and often problematic for the trail. Sealing out the air can cause some ingredients, such as pasta, to pierce open thinner bags.
2. Label each Ziploc bag
Write down the date, meal name, and amount of water to add, simmer time, or any other specific cooking instructions — either write it on the bag or on a small slip of paper that you can insert into the bag.
3. Group Products by Meal Type
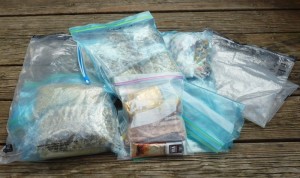

Arrange meals by type and place them in gallon-size (or larger) freezer or odor-proof barrier bags. Grouping by meal versus day gives you greater flexibility to decide what to eat based on your appetite.
- Group by meal, combining all breakfast meals in the first bag, snacks into a 2nd, lunches in a 3rd, and dinners in a 4th bag. Group commonly used ingredients such as sugar, spices, medication/vitamins, dried vegetables, coffee, and condiment packets into separate bags.
- We recommend double bagging coffee or separating it from food; otherwise, the coffee scent will permeate other items and impact flavor. This includes the freeze-dried instant single-serve coffee sold in foil packs.
- Don’t over-pack meals! Rather than pack extra meals, pack extra snacks or cold-soak meals. This way, you can still eat if you run out of fuel or are too tired to fire up the stove.
- A general guide is to plan 1.5 – 2 pounds of total food (including snacks) per person daily. And remember, we can survive 2 weeks without food (or longer, depending on our fat reserve), but drinking water is critical. If you run out of water, do not eat! Your body requires extra water to digest food.
Other Food Packing Tips
- Taste your food before you pack it out! Nothing is worse than sitting down to a bad meal after all that effort to haul it out.
- Think about your daily routine. What crucial items do you need to take? Morning tea/coffee, medication, multi-vitamin, etc.
- For long trips, it is important to have variety. Take foods that have varied textures and flavors. While vegetables don’t contain many calories, they contribute significantly to nutrition, texture, and taste. Food variety keeps it interesting and helps you fulfill your daily nutritional needs..
- The drying process does remove some of the nutrients found in fresh food. Since you will be relying predominately on dried foods, we recommend supplementing your diet with an occasional multivitamin if you will be hiking long-term. Read more about nutrient loss in dried food.
- Keep a supply of dried meals on hand so you are prepared to take a last-minute outdoor adventure. Dried foods have a long shelf life, making them ideal to purchase in advance.
- Don’t forget to pack out! Everything you take out must be packed in. This includes all used trash, meal bags, uneaten foods.
Cooking Backpacking Foods

1. Backpacking Stove
Get a lightweight cook set, backpacking stove, fuel, and fold-down utensils. Look for reusable and multifunctional plastics, such as Lexan sporks.
- Plain aluminum is the lightest and cheapest cooking material, but food particles will stick to it. Titanium will boil water fast, but food will also stick to it. We recommend a non-stick set that allows you to rehydrate your meal in the cooking pot without leaving a mess.
- If you don’t have a non-stick set, you can help prevent food from sticking by adding extra water to meals and drinking the broth.You can also add 1 TB of olive oil when you boil your water. A small amount of oil adds calories to the meal and makes cleaning up easier. This works great for us when we use our non-coated aluminum scout kit.

2. Cooking Method
The quickest method of re-hydrating dried foods involves soaking the food in boiling water. To reconstitute, pour the boiling water directly over the ingredients, stir, seal, and allow the mixture to sit for 10 minutes. For longer cook items, such as pasta, add the dry ingredients with enough water to cover the food (a ratio of 1 part dry to 1-1.5 of water usually works fine) and bring it to a quick boil together. Then, shut off the heat and allow the food to soak in the hot water.
- Some backpackers prefer using their cooking pot to boil water only, eliminating mess. If you don’t want to use your cooking pot for food, ensure any disposable pouches are rated for high-temperature/boiling water.
- Keep your meal hot in cold and windy conditions by insulating the container or pouch with a cozy/hat/jacket.
3. Clean Up
Try cleaning your cook pot with just water and a small scrub sponge. Dried meals are already pre-cooked and should leave little residue since you are only reheating them.

- Make a one-third or smaller sized sponge at home by dividing and cutting a household scouring sponge into equal squares. If you need to use soap, always use the smallest amount (1 drop) of biodegradable soap. Add a splash of water and air dry.
- Don’t dump dishwashing residue in a single spot on the ground—instead, scatter wastewater by tossing it around.
Enjoy the trails!
Related Posts:
7 thoughts on “Packing and Preparing Backpacking Food from the Grocery Store”
Wow it ‘s so helpful. thank for your sharing!
Great article! I love tips about dealing with food, no matter what they are. Thanks!
Great article! A trip far preserved by vacuum sealing bag is best. Thank you for share!
Great post! I alway like tips on dealing with food. Thank you
I was searching for a post like this one. So helpful and motivational!
Awesome advises and ideas. Will have it on my mind for future summer adventures. Thanks for sharing.
Thanks for the blog. I’m looking forward to a couple long hikes this summer and a lot over the fall. This helps immensely with ideas for meal prep.