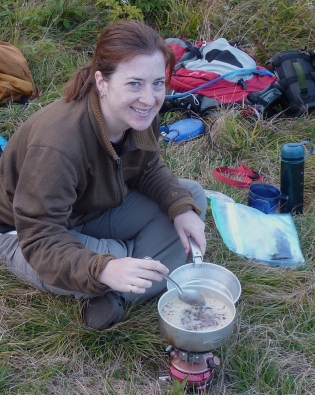
 Whether you have recently started backpacking or are a veteran, you could probably benefit from a few cooking tips.
First, we’ll describe the common method that backpackers use when cooking dried foods and strategies you can use to conserve your cooking fuel when using a backpacking stove. This cooking method is a great concept and works well both on and off the trail. We call it boil-soak cooking. It is incredibly efficient because it uses less fuel and water.
Boil Soak Cooking Instructions
- Set up your backpacking stove. Find a spot to cook on level ground that is insulated from the wind.
- Add the required water to the cooking pot and light your stove.
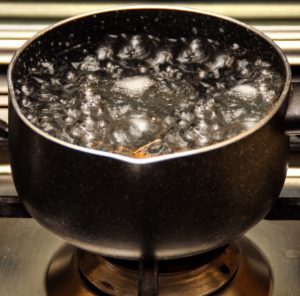
- Put a lid on the cooking pot and bring the water to a rolling boil.
- Quickly stir in the meal ingredients and close the lid tightly. Note: You can also pour the boiling water directly into an insulated container, thermos, or boil bag if you want to keep your pot clean, or need it to make something else.
- Turn off the stove and insulate around the cooking pot/container to retain as much heat as possible. Use a fleece jacket, hat, or pot cozy. Insulating is optional but does speed up the hydration time — especially in wind and cold weather.
- Leave it alone to rest at least 10 minutes, or as instructed on the dehydrated meal. Items such as pasta or instant rice may take up to 15 minutes. Do not open the lid to peek inside!
The boil-soak strategy cooks food the same way as if it were boiling/simmering the entire time, burning away precious fuel. The only caveat to the boil-soak method is that you’ll need to adjust the amount of water you use when cooking standard household food products (non-trail) sold at grocery stores. Standard household cooking instructions are based on the fact that you’ll use no lid and much of the boiling water will be lost through evaporation, or you’ll drain off the excess pasta water, etc. With the boil-soak method, the steam is absorbed into the food to help it cook, rather than dissipate away into the atmosphere. This means less water and fuel are used during cooking because 1) less water is evaporated out from a sustained boil, and 2) the pot cover keeps the heat retained inside the cooking vessel.
Watery Meals? Do not drain any surplus cooking water if the meal is watery; find a use for it or drink the broth, rather than lose the precious nutrients. If the entrée is too soupy, grab some bread to soak up the excess liquid. Boil-and-soak cooking works on most food products, such as dried pasta, instant/freeze-dried/dehydrated foods. It is most suited for pre-mixed (one-pot) meals where all the ingredients are cooked together.
Alternative Cooking Method – add food to cold water
You can combine the cold water and food first and then bring it to a boil (covered, of course). The problem with this method is that it makes clean-up more difficult. It is not recommended for thick saucy dishes, as it tends to splatter all over the lid and get caked onto the pot. It is better suited for soups or stews.
Pre-soaking food to speed up (or eliminate) cooking
You can soak ingredients in cold water while hiking or sleeping to greatly lessen the cooking time and fuel use. This does take extra discipline in meal planning, but the added fuel savings make it worth the effort. It works best when you know what you want to eat a few hours ahead of time or want to eat foods that have not been pre-cooked and dried.
Start by soaking the meal in a pot of cold water. Dump the ingredients into a wide-mouth water bottle or thermos and pour enough water to cover the meal. The soak time can range from a few minutes to an entire night. The longer the soak time, the faster the food will cook.
Decide you want a hot dinner when you stop to eat lunch? While you have your food pack handy, take the extra step to get out the dinner meal and allow it to soak while you are walking. It will slosh around a bit at first but gradually thicken as you hike. When you are ready to eat: Turn on the stove and warm up the meal. Want a hot bowl of thick oats for dinner, rather than the instant variety? Soak the oats before you go to bed, warm them up in the morning, or eat them cold. Most dried meals don’t require pre-soaking; it is just a way to conserve fuel or remove phytic acid (see below). Soaking is intended for less processed or whole-grain foods. Split lentils, pasta, thick rolled oats, quinoa, amaranth, couscous, and rice are some possible candidates. You can also pre-soak dried trail foods when conserving fuel is a priority.
No-Cook Backpacking – cold soaking food in water
If you don’t want to carry a backpacking stove or you run out of fuel while hiking, don’t assume you are stuck eating only snacks and meal bars. Many foods can be prepared without a stove by cold soaking in water instead. We can’t promise a hearty experience, as warm food is comforting to many of us, but it is a viable option when you want to eat a meal. Some ingredients that work well for cold soaking in water –
- Rolled oats – regular oats work well; you do not need to succumb to the instant variety. Soak for about 15 minutes.
- Couscous – the Morrocan style (looks like cornmeal) works well by soaking in cold water. Soak at least 15 minutes and they’ll fluff up.
- Instant Noodles – Asian noodles, such as ramen work best. See Pasta vs Noodles: Which one is better for the trail where we discuss types of noodles that are best for cold-soak.
- Other pre-cooked & dried ingredients – any food items that are dehydrated, freeze-dried, or “instant” should work; these foods are fully or partially cooked before drying and will need adequate time to soak in water to rehydrate.
- Chia Seed – mix into water and dried fruit (for flavor) and soak for 10 minutes. It will form into a pudding; if you are desperate, you can soak in plain water, but it will have almost no flavor.
Phytic Acid & Soaking
A benefit to soaking grains before cooking is that it makes it easier to digest and improves your ability to absorb the nutrients. The hulls of whole grains, legumes, nuts, and seeds contain phytic acid (phytates), which binds to calcium, iron, zinc, and magnesium in your digestive tract. When these minerals bind to phytic acid, they become insoluble and are prevented from entering your blood. Soaking or sprouting helps to neutralize phytic acid in grains and prevent such binding from occurring in your digestive tract.
Now, we’ll cover strategies to Conserve Cooking Fuel when Backpacking.
 Whether you have recently started backpacking or are a veteran, you could probably benefit from a few cooking tips.
3 thoughts on “How to Cook when Backpacking”
Thanks for the good tips on soaking food before hand. I hadn’t thought of this idea but it makes a lot of sense. Especially important when trying to conserve fuel. Another option is to use one of the many wood burning backpacking stoves out there.
Of course these are only good when you have enough woody material to make a fire and you don’t mind putting in a little extra work stoking the fire. I will try out your soaking method while hiking next time we are out on the trail.
Thanks for the tips! I guess I’ve used the “boil soak” method for years without having a name for it, and found this article while researching how to cook slightly more elaborate backpacking meals. Regarding cold soaking ramen, it’s a favorite of mine and takes around 15-20 minutes to get nice and soft. Add some hot sauce and peanut butter for a special treat.
Societies of the world that use portable shelters all year do their cooking inside. It is modern backpackers who try to cook outside their tent and run for home if the weather gets bad. All they need is a 12 ounce chimney so they can do their cooking inside a tarp shelter all sides tight to the ground. Comfort in any kind of weather.
https://www.kijiji.ca/v-view-details.html?adId=1493853018
Google chimpac